Painting a fiberglass door to resemble real wood requires more than choosing a brown color. The surface must look warm, directional, and slightly imperfect. That balance creates the most convincing finish.
This guide explains How to paint a fiberglass door to look like wood using practical preparation, layered color, and controlled grain effects. It covers cleaning, light sanding, bonding primer, base-coat selection, glaze application, and protective topcoats. Each stage matters. A neglected edge can expose the entire illusion.
Bob Flexner, a respected wood-finishing author, offers a principle that applies here: “The finish is only as good as the surface beneath it.” His advice reflects the central challenge. Fiberglass may be smooth and durable, but it still needs careful preparation. Remove grease, dust, and loose coating before painting. Use a fine synthetic brush, a small graining tool, and lint-free cloths. Keep the grain direction consistent with the door’s panels.
Work slowly.
A convincing oak or mahogany effect usually comes from two or three transparent layers, not one heavy coat. The base color should remain visible beneath the darker glaze. Test every mixture on a scrap fiberglass panel or hidden door edge. Color can shift dramatically after drying.
Some imperfections are useful. Real wood is rarely perfectly uniform. However, random streaks can look artificial rather than natural. My own first attempts often became too dark near the corners. Blending immediately solved part of the problem, but not every mistake disappeared. That is why patience, test samples, and realistic expectations matter.
The result should feel like wood at a glance, while still performing like a properly protected fiberglass door.
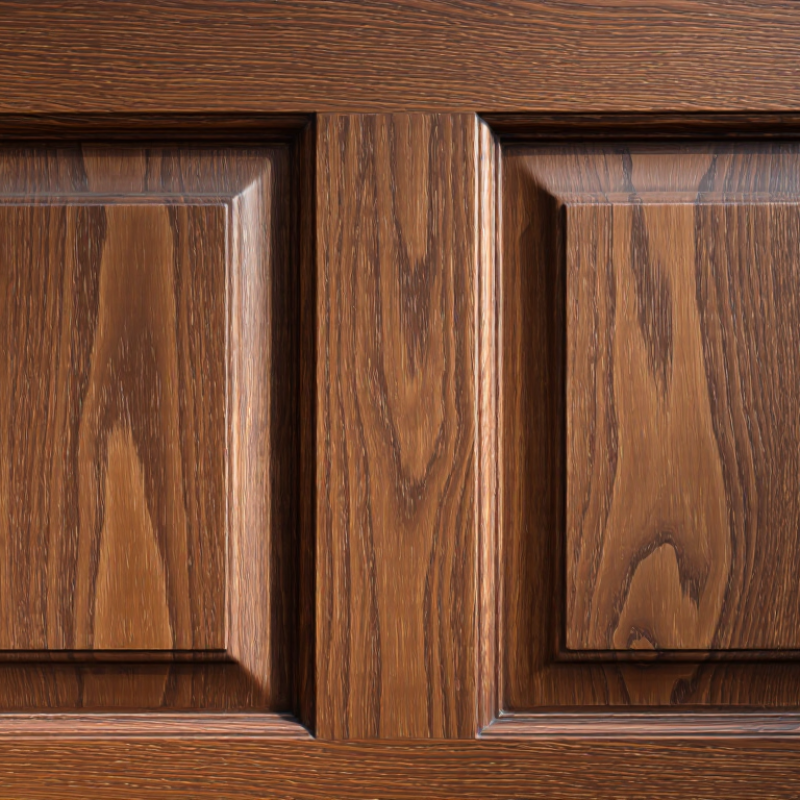
2026 Best Way to Paint a Fiberglass Door Like Wood?
Assess Fiberglass and Weather Limits: Paint at 50–90°F and RH Below 70%
Painting fiberglass to resemble wood starts with surface assessment, not color selection. Check for peeling finish, wax, silicone, cracks, and glossy areas. A clean, lightly abraded surface improves mechanical grip. ASTM D3359-23 treats coating adhesion as a measurable performance property, not a visual guess. Test a small hidden area first. I sometimes skip this step when the surface looks sound. That is a mistake worth remembering.
Weather control matters just as much. Paint when air and surface temperatures stay between 50 and 90°F. Keep relative humidity below 70%, following the practical limits stated in this project brief. The U.S. Department of Energy’s Building America guidance identifies temperature and moisture as important coating-curing variables. Use an infrared thermometer on the door, not only a porch thermometer. Sun-heated fiberglass can exceed the air temperature quickly. Avoid rain, heavy wind, and evening dew for at least 24 hours. Check the forecast twice. A cheap hygrometer helps. Leave the door shaded, dry, and ventilated while the coating cures. Slightly imperfect grain lines often look more natural than rigid ones.
Assess fiberglass and weather limits before painting. A practical application window is 50–90°F with relative humidity below 70%.
Paint only when the fiberglass surface is clean, dry, and within the recommended temperature range. Avoid painting when humidity is 70% or higher, when rain or condensation is expected, or when the door surface is hot from direct sunlight. Always confirm the coating manufacturer's application instructions.
Painting a fiberglass door to resemble wood begins with disciplined surface preparation. Dust, wax, and skin oils can prevent even a quality coating from bonding. The U.S. Department of Energy’s Building America guidance emphasizes that clean, dry substrates improve coating durability. My practical rule is simple: wash the door, rinse thoroughly, and let it dry overnight.
Use 220–320-grit abrasive paper to dull the factory sheen without cutting deeply into the fiberglass texture. Start with 220 grit on glossy areas, then finish with 320 grit for a smoother transition. Keep your pressure light. Heavy sanding can expose fibers, leaving pale scratches that show through a wood-grain glaze. A sanding sponge helps around raised panels and narrow profiles. Wear suitable eye protection and control dust carefully.
Inspect the surface under angled light. Small dents, pinholes, or damaged edges need compatible filler before priming. Allow repairs to cure fully, then sand them level. ASTM D3359 evaluates coating adhesion on a 0B–5B scale, and poor preparation can produce visible failure during testing. That standard is not a promise of household performance, but it gives a useful benchmark. I sometimes sand too aggressively near the latch edge; slowing down there produces a better result. Wipe the door with a clean, lint-free cloth before coating. Do not paint over invisible contamination.
Clean the door with a mild degreaser, then remove wax, dust, and loose residue. Scuff glossy areas lightly with fine abrasive paper. Do not sand through the molded grain. A door-safe bonding primer should grip fiberglass without remaining rubbery under the finish coat.
Follow the primer’s stated recoat and cure times carefully. Temperature and humidity can change drying behavior. The U.S. Department of Energy’s Building America guidance emphasizes surface preparation and controlled application conditions for durable coatings. ASTM D3359 measures adhesion from 0B to 5B; 5B means no visible coating loss in the cross-hatch test. That standard gives a useful quality check, although a home test cannot replace professional evaluation.
I once recoated a door too early. It looked dry, but the finish dragged near the edges. That mistake still influences my process.
Tips: Apply a thin, even primer film. Inspect the lower corners closely. Wait longer in cool, damp weather. Use a clean fingertip only on an inconspicuous spot; surface dryness does not prove full cure. Keep the door supported and avoid closing it until the primer and topcoat resist pressure marks. A short trial area can reveal poor bonding before the entire door shows a wood-grain effect. Reconsider the finish if the primer remains soft, tacky, or easily scratched after the published cure window.
Painting a fiberglass door like wood starts with restraint, not heavy color. Clean the surface, remove gloss with fine abrasive paper, and wipe away dust. Test the coating system inside the hinge edge. The National Association of Realtors’ 2022 Remodeling Impact Report listed steel entry-door replacement at 100% cost recovery, showing why careful entry upgrades deserve attention. That figure does not guarantee painted fiberglass value, but it supports disciplined workmanship.
Apply two thin base coats, allowing each coat to dry fully. A thick coat can hide the molded texture and create soft edges. Use a warm, muted base color rather than a bright brown. With a dry brush, add a darker glaze while the surface remains workable. Pull a wood-grain tool from the top rail toward the floor, matching the door’s natural direction. Rock the tool gently. Real wood rarely repeats perfectly.
Keep a damp cloth nearby. Wipe away one awkward pass before it sets. My first grain attempts often looked too regular, especially near the center panel. That flaw taught me to vary pressure and spacing. The U.S. Department of Energy’s Building America guidance emphasizes durable, properly prepared exterior finishes, while coating-industry technical guidance commonly stresses film thickness and drying control. Follow the coating manufacturer’s temperature limits, and avoid painting in direct sun or high humidity. Fine lines matter. So does patience.
| Stage | Recommended Method | Typical Quantity or Setting | Drying or Working Time | Why It Matters |
|---|---|---|---|---|
| 1. Clean the Door | Wash the fiberglass surface with mild detergent and water, then rinse and allow it to dry completely. | Use a non-abrasive cloth or sponge; avoid soaking unfinished edges. | Allow at least 1 hour to dry in normal indoor conditions. | Removes dirt, grease, and residue that can cause poor adhesion or uneven color. |
| 2. Scuff Sand | Lightly sand glossy areas with fine-grit sandpaper, following the direction of the intended grain. | Use approximately 220–320 grit; do not aggressively sand through the fiberglass skin. | About 10–20 minutes for a standard single door. | Creates a mechanical key for the coating without damaging the molded surface. |
| 3. Remove Dust | Vacuum the door and wipe it with a clean, lint-free damp cloth. | The cloth should be damp, not wet. | Wait until the surface is visibly dry before coating. | Prevents sanding particles from becoming permanent bumps in the finish. |
| 4. Protect Hardware | Remove handles and locks when practical; mask hinges, weatherstripping, glass, and surrounding trim. | Leave a clean coating edge around hardware and seals. | Approximately 15–30 minutes. | Improves precision and prevents paint from interfering with moving or sealing parts. |
| 5. Apply Base Coat 1 | Apply a thin, even coat of exterior-grade acrylic or enamel coating using a high-quality brush or short-nap roller. | Cover the surface without flooding panel recesses or leaving heavy ridges. | Follow the coating label; many water-based coatings need roughly 2–4 hours before recoating. | The first thin coat establishes adhesion and reduces runs on vertical panels. |
| 6. Apply Base Coat 2 | Apply a second thin coat in the same direction, keeping the film smooth and consistent. | Do not try to achieve full opacity with one thick coat. | Allow the recommended recoat interval, commonly 2–4 hours for water-based products. | Two thin coats provide more uniform color and a better foundation for the glaze. |
| 7. Check the Base | Inspect the door in angled light and lightly smooth visible dust nibs only after the coating has hardened. | Use approximately 320–400 grit for minor imperfections. | Allow the base to dry according to the label before applying glaze. | A flat, clean base prevents defects from showing through the simulated grain. |
| 8. Prepare the Grain Glaze | Use a compatible tinted glaze or translucent coating that remains workable long enough to comb. | Prepare a small test area first to confirm color, transparency, and working time. | Mix only the amount that can be applied before it begins to set. | A translucent layer allows the base color to show through like natural wood variation. |
| 9. Apply the Glaze | Spread a thin, wet glaze section by section, working with the panel design and intended wood direction. | Work in manageable sections of approximately 0.25–0.5 m². | Keep each section wet while creating the grain. | Small working sections reduce lap marks and make the grain pattern easier to control. |
| 10. Use the Grain Tool | Pull a rubber wood-grain rocker or comb through the wet glaze with steady, overlapping strokes. | Use long strokes on rails and vertical strokes on stiles; vary the rocker angle slightly. | Correct mistakes immediately while the glaze is still workable. | Changing stroke rhythm prevents a repetitive stamped appearance. |
| 11. Soften the Pattern | Lightly feather harsh edges with a dry, soft brush while preserving the main grain lines. | Use minimal pressure; avoid brushing back and forth excessively. | Complete before the glaze becomes tacky. | Blends transitions and creates a more natural variation in the faux-wood surface. |
| 12. Dry and Protect | Allow the grained layer to dry fully, then apply a compatible clear exterior protective finish if required by the coating system. | Use thin protective coats and avoid closing the door against weatherstripping until fully cured. | Drying may take 24 hours or longer; full cure commonly takes several days. | Protects the decorative layer from moisture, abrasion, and sunlight-related wear. |
Painting a fiberglass door to resemble wood depends on the protective finish. I have found that the grain pattern can look convincing, but the clear coat often decides whether it survives daily handling. Let the wood-tone paint cure fully before sealing it. A rushed finish can trap softness underneath.
Apply two thin coats of a clear finish that is chemically compatible with the paint. Test both products on a hidden edge first. Watch for wrinkling, cloudiness, or poor bonding. Lightly clean the surface, then apply the first coat with even strokes. Avoid heavy buildup around panel edges.
Allow the stated drying time, even when the surface feels dry. Sanding between coats may improve smoothness, but only when the finish instructions permit it. Apply the second coat gently. It should protect the painted grain without making it look plastic.
I also recommend checking adhesion with ASTM D3359. On a cured test area, make a small crosshatch pattern, place pressure-sensitive tape over it, and remove the tape consistently. Compare the result with the method’s 0B to 5B classifications. A high rating is encouraging, not permanent proof. Temperature, moisture, cleaning, and door movement can change performance. My first attempt looked excellent indoors but failed near the handle after repeated use. That mistake changed my process. Test the actual finish on a spare fiberglass section whenever possible. Tiny flaws reveal more than a perfect sample.
Keep air and door temperatures between 50 and 90°F. Relative humidity should stay below 70%. Avoid rain, strong wind, and evening dew for 24 hours. Shade the door while it cures. Check the forecast twice.
Look for peeling finish, wax, silicone, cracks, dents, pinholes, and glossy patches. Use angled light to reveal shallow damage. Test a hidden area first. I sometimes skip this step. That is risky.
Wash the door with a mild degreaser. Remove dust, wax, and skin oils. Rinse thoroughly. Let the surface dry overnight. Wipe it with a clean, lint-free cloth before coating.
Use 220-grit paper on glossy sections. Finish with 320-grit for smoother transitions. Sand lightly and avoid cutting into the molded texture. A sanding sponge works well around raised panels. Heavy sanding can expose pale fiberglass fibers.
Fill small dents, pinholes, and damaged edges with compatible filler. Let the repairs cure completely. Sand them level with the surrounding surface. Check the lower corners carefully. Uneven repairs may remain visible under the wood effect.
Fiberglass needs a primer that grips the surface without staying rubbery. Apply a thin, even film. Follow the published recoat and cure times. Do not repaint only because the surface feels dry. Dry is not fully cured.
Try a small hidden test area before coating the entire door. Watch for dragging, tackiness, softness, or easy scratching. A clean fingertip can check an inconspicuous spot. Reconsider the finish if the primer remains soft after its cure window.
Keep grain lines slightly varied instead of perfectly rigid. Small irregularities can look more natural. Work carefully around edges and latch areas. I often sand too aggressively there. Slowing down improves the result.
Use an infrared thermometer on the door surface. Sun-heated fiberglass can become much warmer than porch air. A basic hygrometer checks humidity. Keep the door supported, dry, shaded, and ventilated during curing.
How to paint a fiberglass door to look like wood begins with careful planning and surface preparation. Choose a day when temperatures are between 50 and 90°F and relative humidity is below 70% so the coatings can cure properly. Clean the door thoroughly, repair minor flaws, and lightly abrade the surface with 220–320-grit sandpaper to improve adhesion without damaging the fiberglass. Remove all dust before applying a door-safe bonding primer, allowing it to dry and cure according to its instructions.
For a convincing wood appearance, apply two thin, even base coats rather than one heavy layer. Once the base is ready, use a grain tool with controlled, natural strokes to create variation in the pattern. Finish with two compatible clear protective coats, allowing sufficient drying time between applications. Before considering the project complete, check the finish for uniform coverage and perform an adhesion test based on ASTM D3359 principles. Proper weather conditions, patience, and thin, well-cured layers will help produce a durable, realistic result.

RZ door