When people ask, “Why is my automatic sensor door not opening,” they often expect a simple battery answer. Sometimes that is correct. However, a silent door may also indicate a blocked sensor, lost power, wiring damage, or a controller fault. The small status light near the sensor can provide an important clue. A steady green light, a flashing red light, or no light at all may suggest different problems.
Look closely.
Start with safe observations, not force. Check whether the door has power, then inspect the sensor lens for dust, rainwater, stickers, or spider webs. Notice whether the operator clicks when someone approaches. Watch the door from different angles, because a sensor may detect movement only within a narrow field. In busy buildings, carts, floor mats, and nearby reflections can also affect detection. My first assumption is often that the sensor failed, but the power switch or door mode may be the real cause.
This guide explains practical troubleshooting steps for automatic sliding, swinging, and commercial entrance doors. It separates simple checks from faults requiring a qualified technician. Manufacturer instructions should guide every adjustment, especially around electrical panels, safety edges, and emergency functions. A reset can restore operation temporarily, but it may conceal a deeper issue. That detail matters. If the door opens unpredictably, moves slowly, makes grinding sounds, or remains unresponsive after basic checks, stop using it and arrange professional service. Reliable diagnosis depends on the door model, installation history, weather conditions, and recent maintenance, not guesswork alone.
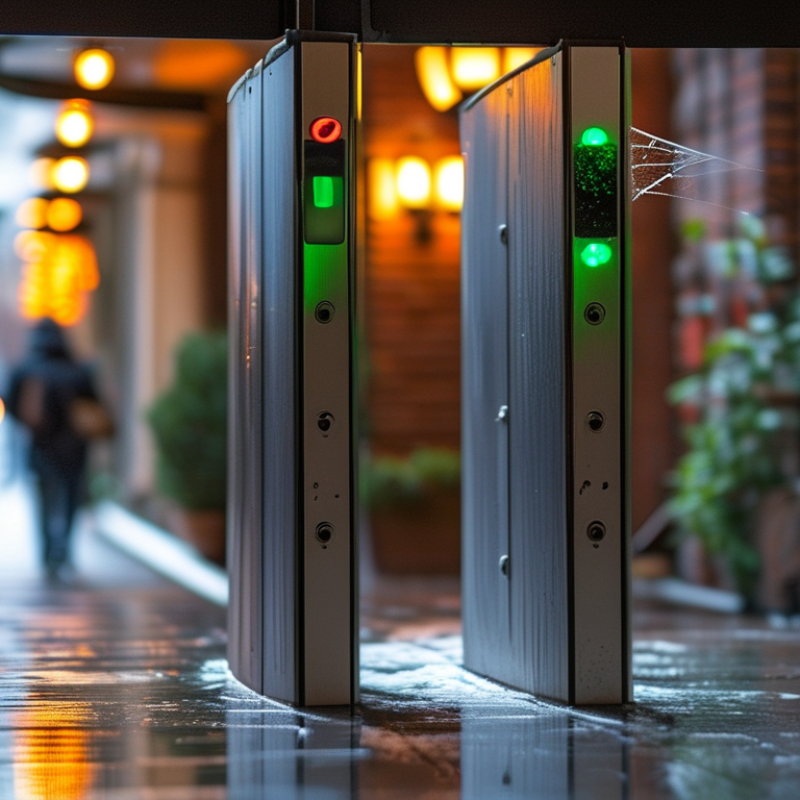
Why Is My Automatic Sensor Door Not Opening?
When an automatic sensor door stays closed, confirm its power before replacing parts. Check whether the control panel receives the required 120 V AC input. Use a properly rated meter, and follow the site’s electrical safety procedures. Do not open live panels unless you are qualified to do so. A tripped breaker, loose terminal, or damaged disconnect can stop the entire system. I have found that a simple power check often prevents unnecessary sensor replacement.
Next, compare the measured voltage with the manufacturer’s installation ratings. The door operator may require 120 V AC, while its sensors and controls use lower voltage. Never assume every terminal has the same output. Read the wiring diagram and check for a blown fuse, inactive control switch, or failed transformer. A correct voltage reading does not always prove the circuit works under load. That detail is easy to miss.
Tips: Test power at the disconnect and operator terminals. Record the readings before resetting anything. Check sensor alignment after power is confirmed. Keep hands clear of moving panels during testing. If readings fluctuate, stop troubleshooting and request a licensed technician. My early checks were sometimes too quick; now I verify connections twice before changing components.
| Check Area | What to Verify | Typical Reference or Acceptable Result | Possible Finding | Recommended Action |
|---|---|---|---|---|
| Safety First | Identify the electrical supply, disconnecting means, and moving-door hazards before testing. | Power isolation is used before opening covers or touching wiring; only qualified personnel perform live electrical tests. | Unexpected movement, exposed conductors, or no accessible disconnect. | Keep people clear, follow lockout/tagout procedures, and use an appropriately rated meter and personal protective equipment. |
| Branch-Circuit Voltage | Measure voltage at the automatic door controller input terminals, not only at the wall receptacle. | Approximately 120 V AC for equipment rated 120 V AC; the exact allowable range must come from the equipment nameplate or installation manual. | 0 V, unstable voltage, or a reading outside the stated equipment rating. | Check the breaker, fuse, disconnect, wiring, and upstream control devices. Do not energize equipment outside its rated voltage. |
| Line, Neutral, and Ground | Confirm correct conductor identification and secure terminations at the controller. | Line-to-neutral voltage matches the rating; protective grounding is continuous and connections are tight. | Reversed, loose, open, or overheated conductors; missing equipment grounding conductor. | De-energize the circuit and have wiring corrected by a qualified electrician in accordance with local electrical requirements. |
| Breaker and Disconnect | Check whether the breaker or local disconnect is on and whether the circuit has tripped repeatedly. | Breaker remains set and the disconnect is fully engaged. | Tripped breaker, blown fuse, or repeated trip after reset. | Do not repeatedly reset a tripping device. Investigate short circuits, overloads, motor faults, or incorrect circuit sizing. |
| Manufacturer Rating | Read the controller and operator nameplate for voltage, frequency, current, and wiring requirements. | Supply voltage and frequency match the listed rating; current protection follows the installation instructions. | Equipment rated for a different voltage, frequency, or power configuration. | Stop operation and consult the applicable installation documentation before replacing parts or changing wiring. |
| Power Indicator and Controller | Observe status LEDs, display messages, or diagnostic indicators after power is confirmed. | The controller shows normal standby or ready status according to its manual. | No indicator, fault code, or continuous reset cycle. | Record the fault indication, cycle power only as permitted by the instructions, and arrange qualified service if the fault returns. |
| Operating Mode | Check the selector or control setting for automatic, hold-open, manual, locked, or off mode. | Automatic mode is selected and no authorized lockout or scheduled closure is active. | Door remains locked, held closed, or responds only to manual controls. | Restore the approved operating mode and verify that access-control devices are releasing the door. |
| Sensor Power | Inspect sensor wiring, connectors, alignment, and status indication. | Sensor receives the low-voltage supply specified by the equipment documentation and changes state when a person approaches. | No sensor light, damaged cable, loose connector, or no change in detection state. | Clean and align the sensor as permitted; repair wiring or replace the sensor only with a compatible, correctly rated component. |
| Safety Sensors | Check presence sensors, safety beams, and monitored edges for obstruction or fault. | Safety devices report clear conditions and are installed within the required detection area. | Obstruction, misalignment, contamination, or a persistent safety fault. | Remove obstructions and clean lenses carefully. Do not bypass a safety device; obtain service if the fault remains. |
| Control Inputs | Verify activation devices such as push plates, request-to-exit switches, key switches, or access-control relays. | The input changes state when activated and matches the controller’s specified contact type and voltage. | Open circuit, stuck relay, incorrect contact type, or disabled access permission. | Test the input using the approved procedure and correct the control circuit without defeating safety or security functions. |
| Mechanical Movement | With power isolated, check for visible obstructions, binding, damaged rollers, or excessive door weight. | Door moves smoothly by the approved manual test method and remains within its track or swing path. | Sticking, impact damage, debris, or abnormal resistance. | Keep the door out of service and arrange mechanical inspection; do not force the door or adjust drive components without authorization. |
| Functional Test | Test approach detection, opening, hold-open time, closing, and safety reversal from a safe position. | Door opens when commanded, remains open for the configured interval, closes safely, and reopens or stops when a safety device detects an obstruction. | Intermittent operation, delayed response, failure to reopen, or unsafe closing. | Remove the door from service and contact qualified automatic-door personnel if any safety function fails. |
: The activation sensor may be blocked, misaligned, dirty, or losing power. Check the approach area for carts, signs, plants, or strong sunlight. A motor problem is possible, but do not assume it first.
Walk toward the door with empty hands. Try the center, both edges, and an angled approach. Record the distance where the door activates. Small differences matter.
No. The light may only show power or basic operation. Approach from several directions and watch for delayed responses. A powered sensor can still have poor coverage.
Check the lens, mounting angle, wiring, and sensor height. Look for dust, glare, wet-floor signs, and changed floor finishes. Clean the lens carefully. Do not adjust sensitivity without proper training.
The door may close unexpectedly, move unevenly, or ignore someone in the doorway. A safety sensor should detect people or objects during movement. Stop using the door if it behaves dangerously. Safety comes first.
A reset may restore operation temporarily. It can also hide a failing component or loose connection. Record the fault pattern before resetting repeatedly. I have relied on resets before. That was not always wise.
Record the fault code, time, weather, and door behavior. Note whether rain, dust, carts, or nearby signs were present. Include recent maintenance and unusual sounds. Details help with intermittent faults.
Contact one when the door opens late, fails intermittently, or closes forcefully. A technician should test sensors, wiring, speed, closing force, and hold-open time. Ask for written findings. Guesswork is risky.
Why is my automatic sensor door not opening? Start by confirming that the door is receiving the correct 120 V AC power and that its controls match the manufacturer’s ratings. Next, check the activation sensors to ensure they detect approaching users within the requirements of ANSI/BHMA A156.10. Dirt, poor alignment, wiring problems, or an incorrect detection range may prevent the door from receiving an opening signal.
Also test the safety sensors and verify that closing force and door movement remain within ANSI/BHMA A156.10 guidelines. Before changing any settings, inspect the tracks, rollers, and surrounding area for debris, damage, or obstructions. Finally, review any displayed fault codes and record when the problem occurs. If the cause is not clear, or if electrical, sensor, or force adjustments are needed, contact an AAADM-qualified automatic door technician for safe diagnosis and repair.

 RZ door